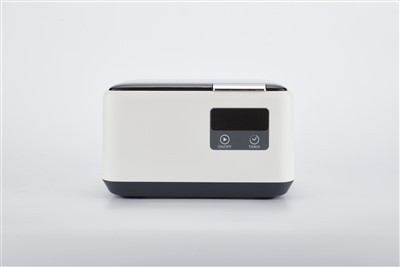
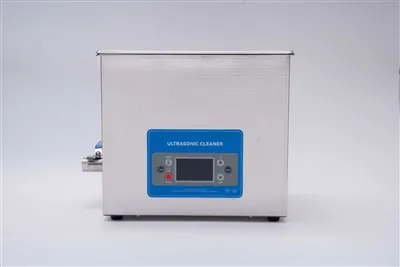
Hey there! As a supplier of 6L ultrasonic parts cleaners, I often get asked about how to prevent the formation of bubbles in the cleaning solution. Bubbles might seem like a minor annoyance, but they can actually affect the cleaning performance of your ultrasonic cleaner. So, let's dive right in and talk about what causes these bubbles and how we can stop them from forming.
First off, let's understand why bubbles are a problem. Ultrasonic cleaners work by creating high - frequency sound waves that generate tiny cavitation bubbles in the cleaning solution. These bubbles collapse near the parts being cleaned, creating a scrubbing action that removes dirt and grime. However, when there are excessive, unwanted bubbles in the solution, they can dampen the ultrasonic waves and reduce the effectiveness of the cavitation process.
One of the main causes of bubble formation is the type of cleaning solution you're using. Some cleaning agents are more prone to foaming than others. For example, if you're using a regular household detergent, it might produce a lot of bubbles. Look for cleaning solutions specifically designed for ultrasonic cleaners. These are formulated to minimize foaming while still providing effective cleaning power. There are many brands out there that offer specialized ultrasonic cleaning solutions. You can usually find them at industrial supply stores or online.
Another factor that can lead to bubble formation is the way you fill the cleaner. If you pour the cleaning solution too quickly, it can create a lot of agitation and cause bubbles to form. When filling your 6L ultrasonic parts cleaner, pour the solution slowly and steadily. Try to avoid splashing it around. Also, make sure you're not overfilling the cleaner. The ideal fill level for most 6L ultrasonic cleaners is about three - quarters full. This gives enough room for the parts to be submerged and for the ultrasonic waves to work properly without creating excessive bubbles due to overcrowding.
Temperature can also play a role in bubble formation. If the cleaning solution is too cold, it might not dissolve properly, leading to bubble creation. On the other hand, if it's too hot, it can cause the solution to evaporate quickly and form bubbles. Most ultrasonic cleaners work best with a cleaning solution temperature between 50 - 60 degrees Celsius. You can use a thermometer to monitor the temperature and adjust it as needed. Some advanced ultrasonic cleaners even have built - in temperature control features to make this process easier.
The parts you're cleaning can also contribute to bubble formation. If the parts are extremely dirty or have a lot of oil and grease on them, they can react with the cleaning solution and cause foaming. Before putting the parts into the cleaner, it's a good idea to do a pre - cleaning. You can use a simple degreaser or wipe them down with a clean cloth to remove the bulk of the dirt and oil. This not only helps reduce bubble formation but also extends the life of your cleaning solution.
Now, let's talk about some additional tips to keep those bubbles at bay. One thing you can do is add an anti - foaming agent to the cleaning solution. These agents are specifically designed to break down bubbles and prevent new ones from forming. You can find anti - foaming agents at most industrial supply stores. Just add a small amount according to the manufacturer's instructions.
Another useful tip is to let the cleaning solution sit for a few minutes after filling the cleaner. This allows any bubbles that were created during the filling process to rise to the surface and dissipate. Once the solution is relatively bubble - free, you can then place the parts in the cleaner.
If you're still having trouble with bubble formation, it might be worth checking the ultrasonic cleaner itself. Sometimes, the transducer (the part that generates the ultrasonic waves) can malfunction and cause uneven agitation in the solution, leading to more bubbles. Make sure the cleaner is properly maintained and that the transducer is in good working condition. If you suspect there's an issue with the transducer, you might need to contact the manufacturer for further assistance.


As a 6L ultrasonic parts cleaner supplier, I know that different customers have different needs. If you're looking for a larger capacity cleaner, we also offer the 15L Capacity Heavy - Duty Parts Cleaning Machine. It's great for larger parts or for cleaning in bulk. And if you're into cycling and need to clean your bike parts, our Ultrasonic Cleaner for Bike Parts is a top - notch option. For firearm enthusiasts, we have the Ultrasonic Gun Parts Cleaner for Firearm Maintenance.
Preventing bubble formation in the cleaning solution of a 6L ultrasonic parts cleaner is all about using the right cleaning solution, filling the cleaner correctly, controlling the temperature, pre - cleaning the parts, and taking some additional steps like using anti - foaming agents. By following these tips, you can ensure that your ultrasonic cleaner works at its best and provides you with efficient and effective cleaning results.
If you're interested in purchasing our 6L ultrasonic parts cleaner or any of our other products, we're here to help. Whether you have questions about the product features, need advice on the best cleaning solutions, or want to discuss pricing and bulk orders, feel free to reach out. We're always happy to have a chat and assist you in finding the perfect cleaning solution for your needs.
References
- "Ultrasonic Cleaning Technology: Principles and Applications" - A technical guide on ultrasonic cleaning and its various aspects.
- Manufacturer's manuals for ultrasonic cleaners, which often contain useful information on operation and maintenance.