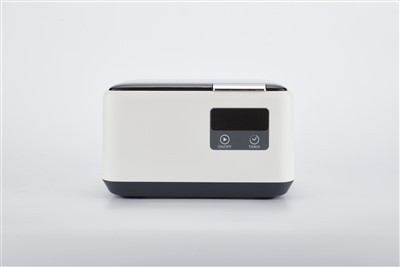
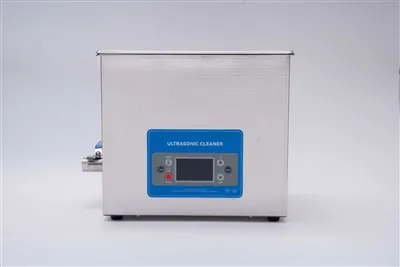
Retainers are essential orthodontic devices that help maintain the alignment of teeth after braces are removed. However, they can accumulate bacteria, plaque, and other debris over time, which can lead to bad breath, tooth decay, and gum disease. To keep retainers clean and hygienic, an ultrasonic cleaner is an effective and convenient solution. As a supplier of Retainers Ultrasonic Cleaners, I will introduce the cleaning process of these devices in detail.
Understanding the Basics of Ultrasonic Cleaning
Ultrasonic cleaning is a technology that uses high - frequency sound waves to create tiny bubbles in a cleaning solution. These bubbles implode, generating a phenomenon known as cavitation. The implosion of these bubbles produces intense local pressure and shock waves that can dislodge dirt, grime, and other contaminants from the surface of an object.
When it comes to cleaning retainers, this technology is particularly useful because it can reach into the small crevices and hard - to - reach areas of the retainer that are difficult to clean by hand. This ensures a thorough and deep clean, leaving the retainer fresh and free from harmful bacteria.
Preparing the Ultrasonic Cleaner
Before starting the cleaning process, you need to prepare the ultrasonic cleaner properly. First, make sure the cleaner is placed on a stable and flat surface. It should be located in an area where it can operate safely without the risk of being knocked over.
Next, fill the cleaning tank of the ultrasonic cleaner with an appropriate cleaning solution. You can use a specialized retainer cleaning solution, which is designed to be gentle on the retainer material while effectively removing dirt and bacteria. Alternatively, a mild dish soap diluted in water can also work well. Do not overfill the tank; usually, filling it to about three - quarters full is sufficient. This allows enough room for the retainer to move freely during the cleaning process.
Pre - Cleaning the Retainer
Before placing the retainer in the ultrasonic cleaner, it is a good practice to give it a quick pre - clean. Rinse the retainer under lukewarm running water to remove any large particles of food or debris. You can also use a soft - bristled toothbrush to gently brush the surface of the retainer. This step helps to reduce the amount of dirt that will enter the cleaning solution in the ultrasonic cleaner, which can extend the life of the solution and improve the overall cleaning efficiency.


Placing the Retainer in the Cleaner
Once the retainer is pre - cleaned, carefully place it in the cleaning tank of the ultrasonic cleaner. Make sure the retainer is fully submerged in the cleaning solution. If the retainer has a complex shape or multiple parts, try to position it in a way that allows the cleaning solution to flow around all areas. Some ultrasonic cleaners come with a basket or a holder, which can be used to keep the retainer in place and prevent it from hitting the sides of the tank during the cleaning process.
Starting the Cleaning Cycle
After placing the retainer in the cleaner, it's time to start the cleaning cycle. Different ultrasonic cleaners may have different control panels and settings. For Digital Ultrasonic Retainer Cleaner, you can usually set the cleaning time and temperature according to the level of dirt on the retainer. A typical cleaning cycle for a retainer may range from 3 to 10 minutes.
During the cleaning cycle, you will hear the high - frequency sound waves generated by the ultrasonic cleaner. This is a normal part of the cleaning process. You may also notice small bubbles forming around the retainer, which is a sign that the cavitation is working effectively to remove the dirt.
Post - Cleaning Steps
Once the cleaning cycle is complete, turn off the ultrasonic cleaner. Carefully remove the retainer from the cleaning tank using clean tweezers or your hands (make sure your hands are clean). Rinse the retainer thoroughly under running water to remove any remaining cleaning solution and loosened debris.
Inspect the retainer to ensure that it is clean. If there are still some stubborn stains or dirt, you can repeat the cleaning process or use a soft toothbrush to gently scrub the affected areas.
Drying the Retainer
After rinsing, pat the retainer dry with a clean, soft towel. Avoid using abrasive materials as they can scratch the surface of the retainer. You can also let the retainer air - dry in a clean, dry place. Make sure it is completely dry before putting it back in your mouth to prevent the growth of mold or bacteria.
Maintaining the Ultrasonic Cleaner
To ensure the long - term performance of the ultrasonic cleaner, regular maintenance is necessary. After each use, empty the cleaning tank and rinse it with clean water. Wipe the inside and outside of the cleaner with a soft, dry cloth to keep it clean.
Periodically, you can run a cleaning cycle with just water in the tank to remove any residue that may have accumulated in the tank. If the cleaner has a filter, follow the manufacturer's instructions to clean or replace it regularly.
Different Types of Retainers and Cleaning Considerations
There are different types of retainers, such as Hawley retainers, clear aligner retainers, and Essix retainers. Each type may require slightly different cleaning considerations.
Hawley retainers have a wire component, which can trap more debris. When placing it in the ultrasonic cleaner, make sure the wire is fully submerged and that the cleaner can effectively clean around it.
Clear aligner retainers and Essix retainers are made of a clear plastic material. They are more delicate, so it is important to use a gentle cleaning solution and not to over - clean them to avoid damaging the material.
Benefits of Using an Ultrasonic Cleaner for Retainers
Using an Ultrasonic Cleaner for Retainers offers several benefits. Firstly, it provides a more thorough clean compared to manual cleaning methods. The cavitation effect can reach areas that are difficult to access with a toothbrush, ensuring that all bacteria and debris are removed.
Secondly, it is a time - saving solution. Instead of spending a lot of time brushing the retainer by hand, you can simply place it in the ultrasonic cleaner and let it do the work in a matter of minutes.
Finally, it helps to maintain the integrity of the retainer. By using a gentle cleaning method, the ultrasonic cleaner can prevent damage to the retainer material, which can extend the lifespan of the retainer.
Conclusion
The cleaning process of retainers using an ultrasonic cleaner is a simple and effective way to keep your retainers clean and hygienic. By following the steps outlined above, you can ensure that your retainer is free from bacteria, plaque, and other contaminants, which is essential for your oral health.
If you are interested in purchasing a high - quality Household Ultrasonic Retainer Cleaner for your personal use or for your dental practice, we are here to assist you. We offer a wide range of ultrasonic cleaners that are designed to meet different needs and budgets. Contact us today to start a procurement discussion and find the best solution for you.
References
- Dental Health Association. (2023). Best Practices for Retainer Cleaning.
- Ultrasonic Cleaning Technology Handbook. (2022). Industry Press.