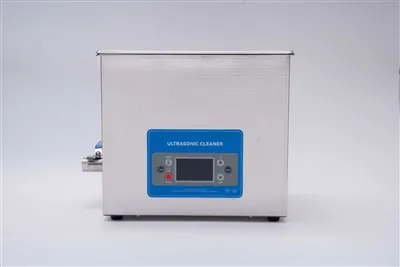
Maintaining a large ultrasonic parts cleaner is crucial for ensuring its optimal performance, longevity, and consistent cleaning results. As a leading supplier of large ultrasonic parts cleaners, I understand the significance of proper maintenance. In this blog, I will delve into the essential maintenance requirements for these powerful cleaning machines.
Regular Cleaning of the Cleaning Tank
The cleaning tank is the heart of the ultrasonic parts cleaner. Over time, debris, contaminants, and residues from the cleaned parts can accumulate at the bottom and on the walls of the tank. This buildup can not only reduce the cleaning efficiency but also potentially damage the ultrasonic transducers.
To clean the tank, first, drain the used cleaning solution completely. Then, use a soft brush or a non - abrasive sponge to gently scrub the tank's interior. Avoid using harsh chemicals or abrasive materials that could scratch the tank surface, as scratches can harbor dirt and reduce the effectiveness of the ultrasonic waves. After scrubbing, rinse the tank thoroughly with clean water to remove all traces of debris and cleaning agents.
It is recommended to clean the tank after every 10 - 15 cleaning cycles, depending on the nature and volume of the parts being cleaned. For applications where parts are heavily soiled, more frequent tank cleaning may be necessary.
Inspection and Maintenance of Ultrasonic Transducers
Ultrasonic transducers are responsible for generating the high - frequency sound waves that create the cavitation effect, which is the key to the cleaning action of an ultrasonic parts cleaner. Regular inspection of these transducers is essential to ensure they are functioning properly.
Visually inspect the transducers for any signs of damage, such as cracks, loose connections, or corrosion. If any damage is detected, it is crucial to replace the damaged transducers immediately to prevent further issues. In addition to visual inspection, it is also a good practice to test the transducers' performance periodically. This can be done using specialized testing equipment that measures the transducer's output power and frequency.
The transducers should be kept clean to maintain their efficiency. Use a soft, dry cloth to wipe the transducers gently. Avoid getting the transducers wet when the cleaner is not in operation, as moisture can cause short - circuits and damage the transducers.
Monitoring and Changing the Cleaning Solution
The cleaning solution plays a vital role in the cleaning process. Over time, the cleaning solution can become contaminated with dirt, oil, and other impurities from the cleaned parts. As the solution becomes less effective, the cleaning results will deteriorate.
Regularly monitor the condition of the cleaning solution. Check for signs of excessive foaming, discoloration, or a strong odor. If the solution appears dirty or its cleaning performance has significantly decreased, it is time to change the solution.
The frequency of solution change depends on several factors, including the type of parts being cleaned, the level of contamination, and the type of cleaning solution used. In general, for light - duty applications, the cleaning solution may need to be changed every 2 - 3 weeks, while for heavy - duty applications, it may need to be changed weekly or even more frequently.
When changing the cleaning solution, make sure to follow the manufacturer's instructions for proper disposal of the used solution. Some cleaning solutions may contain chemicals that require special handling to ensure environmental safety.
Maintaining the Heating System (if applicable)
Many large ultrasonic parts cleaners are equipped with a heating system to enhance the cleaning performance. The heating system helps to increase the temperature of the cleaning solution, which can improve the solubility of dirt and oils and accelerate the cleaning process.
Regularly check the heating element for any signs of damage or malfunction. Inspect the thermostat to ensure it is accurately controlling the temperature of the cleaning solution. If the heating system is not working properly, it can lead to inconsistent cleaning results or even damage the parts being cleaned.
Clean the heating element periodically to remove any scale or sediment buildup. Scale can reduce the efficiency of the heating element and increase energy consumption. Use a descaling agent recommended by the manufacturer to remove the scale safely.
Checking and Maintaining the Pump (if applicable)
Some large ultrasonic parts cleaners are equipped with a pump to circulate the cleaning solution. The pump helps to ensure uniform distribution of the cleaning solution and prevents the formation of dead zones in the tank.
Regularly check the pump for any signs of leaks, unusual noises, or reduced flow rate. If the pump is not functioning properly, it can lead to uneven cleaning and reduced cleaning efficiency. Inspect the pump's impeller and filter for any blockages. Clean or replace the filter as needed to maintain proper pump performance.
Electrical System Maintenance
The electrical system of the large ultrasonic parts cleaner is another critical component that requires regular maintenance. Check all electrical connections for tightness and signs of corrosion. Loose connections can cause electrical arcing, which can damage the components and pose a safety hazard.
Inspect the power cord for any signs of wear or damage. If the power cord is damaged, it should be replaced immediately. It is also important to ensure that the cleaner is properly grounded to prevent electrical shock.
Regularly test the electrical safety features of the cleaner, such as the circuit breaker and the ground fault circuit interrupter (GFCI). These safety features are designed to protect the user from electrical hazards in case of a malfunction.
Storage and Transportation Considerations
If the large ultrasonic parts cleaner needs to be stored for an extended period or transported, proper precautions should be taken.


When storing the cleaner, drain the cleaning solution completely and clean the tank thoroughly. Disconnect all electrical connections and cover the cleaner with a protective cover to prevent dust and debris from accumulating. Store the cleaner in a dry, cool place away from direct sunlight and extreme temperatures.
During transportation, make sure the cleaner is properly secured to prevent damage. Avoid rough handling and vibrations that could damage the internal components.
In conclusion, proper maintenance of a large ultrasonic parts cleaner is essential for its long - term performance and reliability. By following these maintenance requirements, you can ensure that your cleaner continues to provide efficient and effective cleaning for years to come.
If you are interested in learning more about DIY ultrasonic parts cleaners, you can visit DIY Ultrasonic Parts Cleaner. For information on cleaning bike parts with an ultrasonic cleaner, check out Cleaning Bike Parts With Ultrasonic Cleaner. And if you are in the market for a large ultrasonic parts cleaner, please visit our product page Large Ultrasonic Parts Cleaner.
If you have any questions about our large ultrasonic parts cleaners or would like to discuss your specific cleaning needs, please feel free to reach out to us. We are always ready to assist you in finding the best solution for your parts cleaning requirements.
References
- Manufacturer's manuals of large ultrasonic parts cleaners
- Industry standards and guidelines for ultrasonic cleaning equipment maintenance