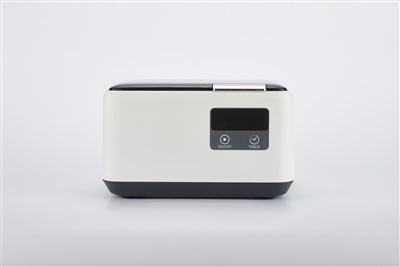
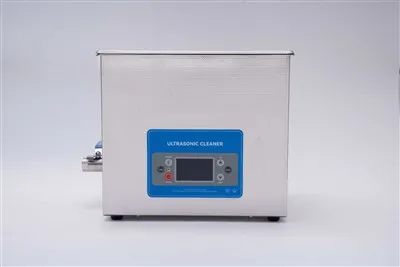
Hey there, fellow bike enthusiasts! If you're like me, you know how important it is to keep your bike chain clean. A dirty chain can lead to all sorts of problems, from poor performance to premature wear and tear. That's where an ultrasonic bike chain cleaner comes in handy. In this blog post, I'm gonna share with you how to install an ultrasonic bike chain cleaner, and I'll also tell you a bit about our products as an ultrasonic bike chain cleaner supplier.
Why an Ultrasonic Bike Chain Cleaner?
Before we dive into the installation process, let's talk about why you should consider getting an ultrasonic bike chain cleaner. Ultrasonic cleaning technology uses high-frequency sound waves to create tiny bubbles in a cleaning solution. These bubbles implode, creating a scrubbing action that can reach into the smallest crevices of your bike chain, removing dirt, grime, and grease that traditional cleaning methods might miss. It's fast, efficient, and does a really thorough job.


What You'll Need
First things first, let's go over what you'll need to install your ultrasonic bike chain cleaner. Here's a list:
- Ultrasonic bike chain cleaner: Obviously, you'll need the cleaner itself. We offer a variety of options, like the 6L Ultrasonic Parts Cleaner, which is great for medium-sized cleaning jobs, and the Large Ultrasonic Parts Cleaner if you've got a bigger chain or multiple chains to clean at once.
- Cleaning solution: You can use a specialized bike chain cleaning solution or a mild detergent. Just make sure it's safe for your bike chain and the materials in the cleaner.
- Power source: Most ultrasonic cleaners run on electricity, so you'll need a nearby power outlet.
- A flat, stable surface: You'll want to place your cleaner on a surface that won't tip over or get damaged by the cleaning solution.
Step-by-Step Installation
Now, let's get into the actual installation process. It's not too complicated, but it's important to follow these steps carefully to make sure everything works properly.
Step 1: Choose the Right Location
Find a flat, stable surface in a well-ventilated area. You don't want to be breathing in the fumes from the cleaning solution, and you also want to make sure the cleaner won't be knocked over. A workbench or a table in your garage or bike shed is usually a good choice.
Step 2: Unpack the Cleaner
Carefully unpack your ultrasonic bike chain cleaner and make sure you have all the parts. You should have the cleaner unit, a basket or holder for the chain, and any other accessories that came with it. Check for any damage or missing parts. If you find anything wrong, contact us right away.
Step 3: Fill the Cleaner with Solution
Fill the cleaner with the appropriate amount of cleaning solution. The instructions that came with your cleaner will tell you how much to use. Make sure not to overfill it, as the solution might spill out when the cleaner is running.
Step 4: Connect the Power
Plug the cleaner into a power outlet. Make sure the power switch is in the off position before you do this. Once it's plugged in, you're ready to turn it on.
Step 5: Place the Chain in the Cleaner
Put your bike chain in the basket or holder that came with the cleaner. Make sure it's fully submerged in the cleaning solution. If you're cleaning multiple chains, you can stack them in the basket, but don't overcrowd it.
Step 6: Turn on the Cleaner
Flip the power switch to the on position. You should hear a humming sound, which means the ultrasonic waves are working. The cleaning process usually takes about 15 to 30 minutes, depending on how dirty your chain is.
Step 7: Monitor the Cleaning
Keep an eye on the cleaner while it's running. You might notice some bubbles and foam forming on the surface of the solution. This is normal and means the cleaning is working. If you see any problems, like the solution overflowing or the cleaner making strange noises, turn it off immediately and check for issues.
Step 8: Remove the Chain
Once the cleaning cycle is complete, turn off the cleaner and unplug it from the power outlet. Carefully remove the chain from the cleaner using gloves or tongs, as the solution might be hot. Rinse the chain thoroughly with clean water to remove any remaining cleaning solution.
Step 9: Dry the Chain
Pat the chain dry with a clean towel or let it air dry. You can also use a hair dryer on a low setting to speed up the drying process. Once it's dry, your chain is ready to be reinstalled on your bike.
Tips and Tricks
- Use the right cleaning solution: Different cleaners work better with different types of chains. Make sure you choose a solution that's compatible with your chain material.
- Clean regularly: To keep your chain in top condition, it's a good idea to clean it regularly. How often you clean it depends on how often you ride your bike and the conditions you ride in.
- DIY options: If you're feeling adventurous, you can even try making your own DIY Ultrasonic Parts Cleaner. Just make sure you follow the instructions carefully and use the right materials.
Contact Us for More Information
If you have any questions about installing or using an ultrasonic bike chain cleaner, or if you're interested in purchasing one of our products, don't hesitate to get in touch with us. We're here to help you keep your bike running smoothly.
References
- "Bicycle Maintenance Guide" - Various cycling publications
- Manufacturer's instructions for ultrasonic bike chain cleaners