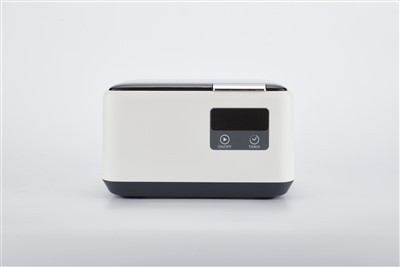
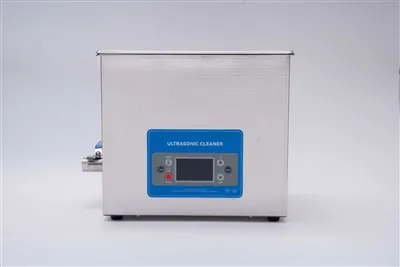
Hey there, fellow cleaning enthusiasts! As a supplier of Ultrasonic Parts Cleaners, I often get asked, "How often should I clean the ultrasonic parts cleaner itself?" It's a great question, and one that can make a big difference in the performance and longevity of your cleaner. So, let's dive right in and explore this topic.
Understanding the Basics of Ultrasonic Parts Cleaners
First off, let's quickly go over how ultrasonic parts cleaners work. These nifty machines use high - frequency sound waves to create tiny bubbles in a cleaning solution. When these bubbles collapse, they generate a powerful scrubbing action that can remove dirt, grease, and grime from all sorts of parts. Whether you're cleaning Cleaning Bike Parts With Ultrasonic Cleaner, firearm components with an Ultrasonic Gun Parts Cleaner for Firearm Maintenance, or automotive parts with Bulk Ultrasonic Automotive Parts Cleaners, the principle remains the same.
But just like any other piece of equipment, ultrasonic parts cleaners need some TLC to keep them running smoothly.


Factors Affecting Cleaning Frequency
The frequency with which you should clean your ultrasonic parts cleaner depends on several factors.
Usage Frequency
If you're using your cleaner every day, it's going to get dirty faster than if you only use it once a month. For heavy - daily use, like in a professional automotive shop or a gunsmith's workshop, you'll probably need to clean the cleaner at least once a week. On the other hand, if it's just for occasional home use, say cleaning your bike parts every few months, you might only need to clean it every couple of months.
Type of Parts Being Cleaned
The nature of the parts you're cleaning also plays a huge role. If you're cleaning parts that are extremely dirty, covered in thick grease or heavy rust, they're going to shed a lot of debris into the cleaning solution. This debris can build up in the cleaner and affect its performance. For example, cleaning old, dirty automotive engine parts will require more frequent cleaning of the ultrasonic cleaner compared to cleaning relatively clean jewelry pieces.
Quality of the Cleaning Solution
Using a high - quality cleaning solution can make a big difference. Some cheaper solutions may leave behind residues more quickly, which can clog the cleaner's transducers or other components. If you're using a budget - friendly solution, you might need to clean the cleaner more often. Conversely, a good - quality, high - performance solution can reduce the amount of build - up and allow you to clean the cleaner less frequently.
Signs That Your Cleaner Needs Cleaning
It's not always easy to know exactly when it's time to clean your ultrasonic parts cleaner. Thankfully, there are some tell - tale signs to look out for.
Reduced Cleaning Performance
If you notice that your parts aren't getting as clean as they used to, even after a full cleaning cycle, it could be a sign that your cleaner needs some attention. This could be due to a build - up of dirt and debris on the transducers, which are responsible for generating the ultrasonic waves. When the transducers are covered in gunk, they can't produce the waves effectively, leading to poor cleaning results.
Strange Noises
Another sign is if your cleaner starts making strange noises. A healthy ultrasonic cleaner should produce a relatively uniform, quiet humming sound. If you start hearing rattling, screeching, or other unusual noises, it could be a sign that there's something wrong, like debris caught in the pump or other moving parts.
Cloudy or Foul - Smelling Solution
Take a look at the cleaning solution in your cleaner. If it's looking cloudy, murky, and has a bad smell, it's definitely time for a cleaning. A filthy solution not only affects the cleaning performance but can also cause damage to your parts over time.
Cleaning Your Ultrasonic Parts Cleaner
When it's time to clean your cleaner, here's a simple step - by - step guide:
- Unplug the Cleaner: Safety first! Always unplug your ultrasonic cleaner from the power source before you start cleaning it.
- Empty the Solution: Carefully pour out the old cleaning solution into an appropriate container. Make sure to follow local regulations for disposing of used cleaning solutions.
- Remove Debris: Use a soft brush or cloth to remove any visible debris from the bottom and sides of the cleaner's tank. You can also use a vacuum cleaner with a soft attachment to suck up loose particles.
- Clean the Transducers: The transducers are the heart of the ultrasonic cleaner. Gently clean them with a soft, damp cloth. Avoid using abrasive materials that could scratch the transducers.
- Rinse the Tank: Fill the tank with clean water and run the cleaner for a few minutes to rinse out any remaining debris. Drain the water and repeat if necessary.
- Wipe Dry: Once you're satisfied that the cleaner is clean, use a dry cloth to wipe the tank and other surfaces dry. Make sure there's no moisture left, as this can cause rust or damage to the electrical components.
Recommended Cleaning Schedules
Based on the factors we discussed earlier, here are some general recommendations for cleaning your ultrasonic parts cleaner:
Light Usage (Once a Month or Less)
For occasional home users, like someone who uses the cleaner to clean small, relatively clean items such as jewelry or small bike parts every once in a while, a good rule of thumb is to clean the cleaner every 2 - 3 months. This will help keep it in good working condition without over - cleaning.
Medium Usage (Once a Week)
If you're using the cleaner to clean a variety of parts on a weekly basis, like in a small - scale hobbyist workshop, you should aim to clean the cleaner every 2 - 3 weeks. This will prevent the build - up of debris and ensure consistent cleaning performance.
Heavy Usage (Daily)
In a professional setting, such as an automotive repair shop or a gun manufacturing facility, where the cleaner is used multiple times a day, it's crucial to clean the cleaner at least once a week. This frequent cleaning will help maintain the efficiency and longevity of the cleaner.
Maintaining Your Ultrasonic Parts Cleaner
Regular cleaning is just one part of the equation. To keep your ultrasonic parts cleaner in top shape, here are a few additional maintenance tips:
- Check the Power Cord: Regularly inspect the power cord for any signs of damage, such as fraying or exposed wires. If you notice any issues, replace the cord immediately to prevent electrical hazards.
- Store Properly: When not in use, store the cleaner in a dry, cool place. Avoid exposing it to extreme temperatures or humidity, as this can damage the electrical components.
- Use the Right Cleaning Solution: Always use the cleaning solution recommended by the manufacturer. Using the wrong solution can damage the cleaner and reduce its performance.
Conclusion
So, how often should you clean your ultrasonic parts cleaner? It really depends on your usage frequency, the type of parts you're cleaning, and the quality of the cleaning solution. By paying attention to the signs that your cleaner needs cleaning and following a regular maintenance schedule, you can ensure that your cleaner lasts for years and continues to do an excellent job of cleaning your parts.
If you're in the market for a new ultrasonic parts cleaner or have any questions about maintenance, don't hesitate to reach out. We're here to help you find the perfect solution for your cleaning needs. Whether you need a cleaner for your bike parts, gun parts, or automotive components, we've got you covered.
References
- Manufacturer's guidelines for ultrasonic parts cleaners
- Industry best practices for ultrasonic cleaning equipment maintenance