As a supplier of DIY Ultrasonic Parts Cleaners, I often receive inquiries from customers looking to upgrade their existing setups. Upgrading your DIY ultrasonic parts cleaner can enhance its performance, increase its efficiency, and extend its lifespan. In this blog post, I'll share some practical tips and strategies on how you can upgrade your current cleaner to meet your evolving cleaning needs.
Understanding the Basics of Ultrasonic Cleaning
Before diving into the upgrade process, it's essential to understand how ultrasonic cleaning works. Ultrasonic cleaners use high-frequency sound waves to create tiny bubbles in a cleaning solution through a process called cavitation. These bubbles implode upon contact with the surface of the parts being cleaned, removing dirt, grease, and other contaminants. The effectiveness of an ultrasonic cleaner depends on several factors, including the frequency of the sound waves, the power of the transducer, and the quality of the cleaning solution.
Upgrading the Transducer
The transducer is the heart of an ultrasonic cleaner, responsible for converting electrical energy into ultrasonic waves. Upgrading to a more powerful transducer can significantly improve the cleaning performance of your DIY cleaner. Look for transducers with higher wattage and frequency ratings, as these will generate more intense cavitation and provide a deeper clean. Additionally, consider using multiple transducers to distribute the ultrasonic energy more evenly across the cleaning tank.


Enhancing the Cleaning Tank
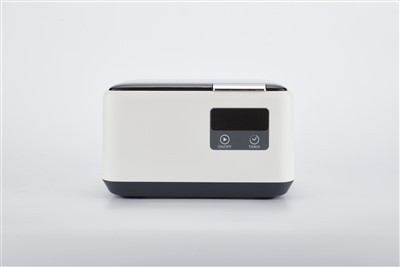
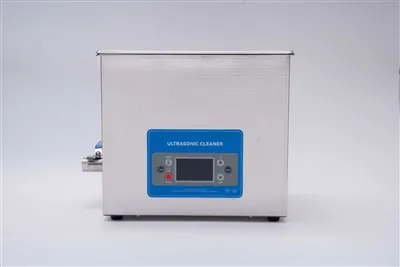
The size and material of the cleaning tank can also impact the performance of your ultrasonic cleaner. If you frequently clean large or bulky parts, upgrading to a larger tank can provide more space and allow for better immersion. Large Ultrasonic Parts Cleaner are designed to accommodate oversized items and offer enhanced cleaning capabilities.
In terms of material, stainless steel is the preferred choice for ultrasonic cleaning tanks due to its durability and resistance to corrosion. If your current tank is made of a different material, consider replacing it with a stainless steel tank to improve its longevity and performance.
Improving the Heating System
Many ultrasonic cleaners come with a heating system to warm the cleaning solution, which can enhance the cleaning process by increasing the solubility of contaminants and improving the cavitation effect. If your DIY cleaner lacks a heating system or if the existing one is inefficient, upgrading it can make a significant difference. Look for heating elements with adjustable temperature settings, allowing you to control the temperature of the cleaning solution for optimal cleaning results.
Upgrading the Control Panel
A user-friendly control panel can make operating your ultrasonic cleaner more convenient and efficient. Consider upgrading to a control panel with advanced features such as digital timers, temperature controls, and power adjustment settings. These features allow you to customize the cleaning process according to the specific requirements of your parts, ensuring a thorough and consistent clean.
Using High-Quality Cleaning Solutions
The choice of cleaning solution is crucial for achieving optimal cleaning results. Different types of contaminants require different cleaning solutions, so it's essential to select a solution that is specifically formulated for the materials and contaminants you are dealing with. Using high-quality cleaning solutions can also help protect your parts from damage and corrosion.
Maintaining and Troubleshooting Your Upgraded Cleaner
Once you've upgraded your DIY ultrasonic parts cleaner, it's important to maintain it properly to ensure its continued performance. Regularly clean the tank and transducer, replace the cleaning solution as needed, and check for any signs of wear or damage. If you encounter any issues with your cleaner, refer to the manufacturer's instructions or consult a professional for troubleshooting and repairs.
Case Study: Upgrading a DIY Ultrasonic Gun Parts Cleaner
Let's take a look at a real-life example of how upgrading a DIY ultrasonic parts cleaner can make a significant difference. A customer who used a basic DIY ultrasonic cleaner for firearm maintenance was experiencing subpar cleaning results and was looking for a way to improve the performance of their cleaner.
After consulting with our team, the customer decided to upgrade their cleaner by installing a more powerful transducer, replacing the cleaning tank with a stainless steel one, and adding a heating system with adjustable temperature settings. They also switched to a high-quality gun cleaning solution specifically formulated for removing carbon, lead, and other contaminants from firearm parts.
The results were remarkable. The upgraded cleaner was able to remove stubborn dirt and grime from the gun parts more effectively, leaving them clean and ready for use. The customer was extremely satisfied with the improvement in cleaning performance and the overall durability of the upgraded cleaner.
If you're interested in upgrading your own DIY ultrasonic parts cleaner or if you're looking for a high-quality pre-built cleaner, Ultrasonic Gun Parts Cleaner for Firearm Maintenance offers a range of options to suit your needs. Our products are designed with the latest technology and highest quality materials to provide superior cleaning performance and reliability.
Conclusion
Upgrading your existing DIY ultrasonic parts cleaner can be a cost-effective way to improve its performance and meet your evolving cleaning needs. By following the tips and strategies outlined in this blog post, you can enhance the cleaning power, efficiency, and durability of your cleaner. Whether you're a hobbyist or a professional, a well-maintained and upgraded ultrasonic cleaner can make your cleaning tasks easier and more effective.
If you have any questions or need further assistance with upgrading your DIY ultrasonic parts cleaner, please don't hesitate to contact us. We're here to help you find the best solutions for your specific requirements and ensure that you get the most out of your ultrasonic cleaning equipment.
References
- "Ultrasonic Cleaning: Principles and Applications" by John T. Costlow
- "The Handbook of Cleaning Validation" by Michael S. Bergeron
- Manufacturer's manuals and technical specifications for ultrasonic cleaning equipment