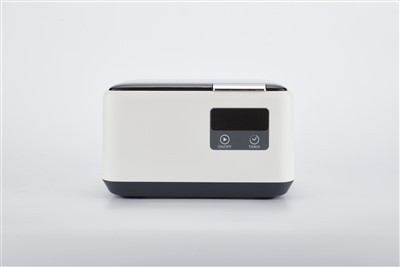
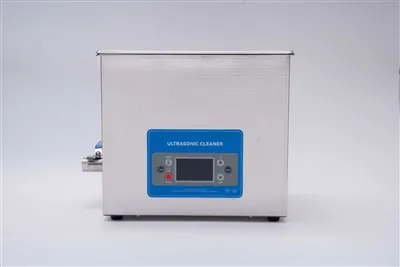
Hey there! As a supplier of powerful ultrasonic parts cleaners, I often get asked by customers, "How do I know if a powerful ultrasonic parts cleaner is working properly?" Well, in this blog, I'm gonna share some tips and signs to help you figure that out.
Understanding the Basics of Ultrasonic Cleaning
First off, let's quickly go over how ultrasonic parts cleaners work. These cleaners use high - frequency sound waves, typically in the ultrasonic range (above 20,000 Hz), to create tiny bubbles in a cleaning solution. This process is called cavitation. When these bubbles collapse near the surface of the parts being cleaned, they generate a powerful scrubbing action that can remove dirt, grease, and other contaminants.
Visual Inspection
One of the easiest ways to tell if your ultrasonic parts cleaner is working is through visual inspection.
Before and After Comparison
Take a good look at the parts you're about to clean. Note the areas with heavy dirt, grime, or rust. After running the cleaner for the recommended time, check the parts again. If the dirt has been significantly reduced or removed, it's a good sign that the cleaner is doing its job. For example, if you're cleaning Large Ultrasonic Parts Cleaner, you should see a visible difference in the cleanliness of the large components.


Bubble Activity
When the cleaner is turned on, you should see a lot of tiny bubbles forming and rising in the cleaning solution. These bubbles are a result of the cavitation process. If you notice very few bubbles or no bubbles at all, there might be an issue. It could be due to a problem with the ultrasonic generator, a low - level of cleaning solution, or incorrect frequency settings.
Auditory Cues
Yes, you can also use your ears to check if the cleaner is working.
The Sound of Cavitation
A properly functioning ultrasonic parts cleaner will produce a distinct, high - pitched humming sound. This sound is a by - product of the cavitation process. If the sound is very weak or has changed in pitch or tone, it could indicate a problem. For instance, a sudden change in the sound might mean that the ultrasonic transducer is damaged or that there's an electrical issue with the generator.
Testing with a Test Piece
Another way to verify the performance of your ultrasonic parts cleaner is by using a test piece.
Aluminum Foil Test
You can take a small piece of aluminum foil and submerge it in the cleaning solution. Run the cleaner for a short period, say 1 - 2 minutes. If the cleaner is working properly, the foil will show signs of pitting and erosion on the surface. This is because the cavitation bubbles are hitting the foil and causing physical damage. However, be careful not to leave the foil in for too long, as it can damage the transducer if it gets too close.
Monitoring the Temperature
The temperature of the cleaning solution can also give you clues about the cleaner's performance.
Normal Temperature Rise
During the cleaning process, the temperature of the cleaning solution will gradually rise. This is normal because the energy from the ultrasonic waves is being converted into heat. A moderate temperature increase, usually within a few degrees Celsius, is a sign that the cleaner is working efficiently. However, if the temperature rises too quickly or gets too hot, it could be a sign of a malfunction. It might be due to an overloaded transducer or a problem with the cooling system.
Checking the Electrical Components
As a supplier, I know that the electrical components play a crucial role in the proper functioning of the ultrasonic parts cleaner.
Power Supply
Make sure that the cleaner is properly plugged in and that the power supply is stable. A fluctuating power supply can cause the cleaner to work inefficiently or not at all. You can use a multimeter to check the voltage at the power outlet. The voltage should be within the range specified in the cleaner's manual.
Ultrasonic Generator
The ultrasonic generator is responsible for producing the high - frequency electrical signals that drive the transducer. If the generator is not working properly, the cleaner won't generate the necessary ultrasonic waves. Look for any signs of overheating, such as a burning smell or visible damage to the generator. If you suspect an issue with the generator, it's best to have it checked by a professional.
Compatibility with Cleaning Solutions
Using the right cleaning solution is essential for the proper functioning of the ultrasonic parts cleaner.
Correct Solution Selection
Different types of parts require different cleaning solutions. For example, if you're cleaning Bulk Ultrasonic Automotive Parts Cleaners, you'll need a solution that's specifically designed to remove automotive grease and oil. Using the wrong solution can not only reduce the cleaning efficiency but also damage the parts or the cleaner itself.
Solution Concentration
The concentration of the cleaning solution also matters. If the solution is too dilute, it might not be able to effectively remove the dirt. On the other hand, if it's too concentrated, it could cause corrosion or other damage to the parts. Follow the manufacturer's instructions regarding the correct concentration of the cleaning solution.
Long - Term Performance
It's also important to consider the long - term performance of the ultrasonic parts cleaner.
Consistency
Over time, the cleaner should consistently produce good cleaning results. If you notice a gradual decline in the cleaning performance, it could be a sign of wear and tear. Components like the transducer might be losing their efficiency, or there could be a build - up of deposits inside the cleaner.
Maintenance
Regular maintenance is key to ensuring the long - term performance of the cleaner. This includes cleaning the tank, checking the electrical connections, and replacing worn - out parts as needed. For example, if you're using an Ultrasonic bike chain cleaner, make sure to clean the tank after each use to prevent the build - up of dirt and debris.
Conclusion
So, there you have it! By using these methods, you can easily determine if your powerful ultrasonic parts cleaner is working properly. If you're still having trouble or suspect a problem, don't hesitate to reach out. We're here to help you keep your ultrasonic parts cleaner in top - notch condition. Whether you're looking to purchase a new cleaner or need support for your existing one, we're just a message away. Contact us to discuss your requirements and let's find the best solution for your cleaning needs.
References
- Ultrasonic Cleaning Technology Handbook
- Manufacturer's Manuals for Ultrasonic Parts Cleaners